Showing posts with label tutorial. Show all posts

Tuesday, January 9, 2018

Tech Tuesday-SMART Notebook SMART LAB

SMART Notebook has undergone some changes in the last year, one of the most notable changes is that the program no longer supports flash.  While this has been a struggle for a lot of teachers who depend on flash based interactives from the gallery, the good news is the SMART LAB has been expanded and improved.  SMART Technologies realizes that teachers don't have lots of extra time so they have tried to streamline the process of making customizable, flexible, and engaging games and activities for your students.

What is SMART LAB?

The Lesson Activity Builder (or LAB) was introduced in SMART Notebook a few years ago, but version 17 includes many more options to engage students than previous versions.  There are 11 different activities to choose from including a games, assessments, and brainstorming activities.


How do I build an activity?

Click on the SMART LAB icon and select the type of activity you want to create.  It will then walk you through the creation of your activity and the different settings available.


Where can I download pre-made activities?

You can find activities created by other teachers by searching on SMART Exchange.  Search for the content you want and narrow your search results by LAB Activities.

Can I change pre-made activities?

If you find an activity from SMART Exchange that is good, but not exactly what you are looking for you can change it by clicking on the pencil icon in the top right corner.

How do students engage in the activities?

Some activities require students to have their own device, and others have the flexibility to be played on the SMART board as a center (or whole class) or can be accessed on individual student devices.  To use their own devices, students will need to go to classlab.com. The website will prompt them to put in your class code.  The code is an 8 digit number, but students should only have to type it in once.  After that their device will remember the class, so all they need to do is select their name.


Can I see some examples of SMART LAB activities?

Yes!  Here is a SMART doc that you can download to see some of the activities in action.  Below you can also find a video where I demo some of the features.


Please let me know (via comment or email) if you would like some help getting set up or planning for a SMART LAB activity or if you have any questions!

Tuesday, October 3, 2017

Tech Tuesday-Padlet

Many of us are gearing up for the Global Read Aloud and through this process, several teachers have approached me about Padlet.

There are two things that I LOVE about Padlet.  The first is the versatility!  It is basically an online cork board where you can add notes, videos, images, or links. 

The other thing I love is that students DO NOT need a login to add something to your Padlet. So it is a quick and efficient way to get students to collaborate or show what they know.  Also, it's easy to share your Padlets with students via Seesaw or Google Classroom.  The possibilities are endless!

Check out how other teachers are using Padlet:

Community KWL Chart


credit: http://iheartedtech.blogspot.com/2013/12/padlet-in-classroom.html


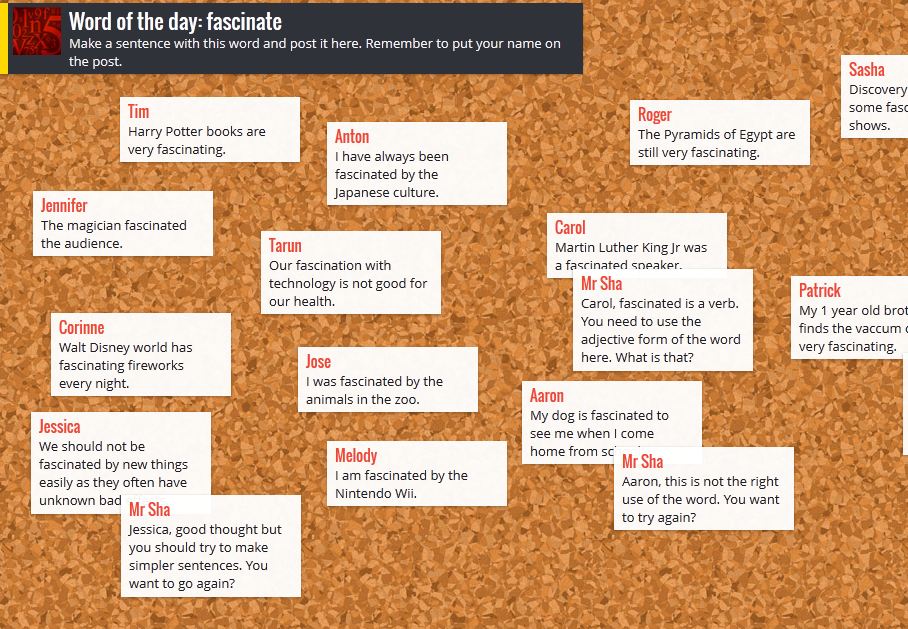
Vocabulary/Word Work


credit: https://5j2014msconneally.wordpress.com/2014/01/15/padlet-web-2-0-tool-for-the-classroom/

Sharing


credit: https://innovateigniteinspire.com/tag/padlet/

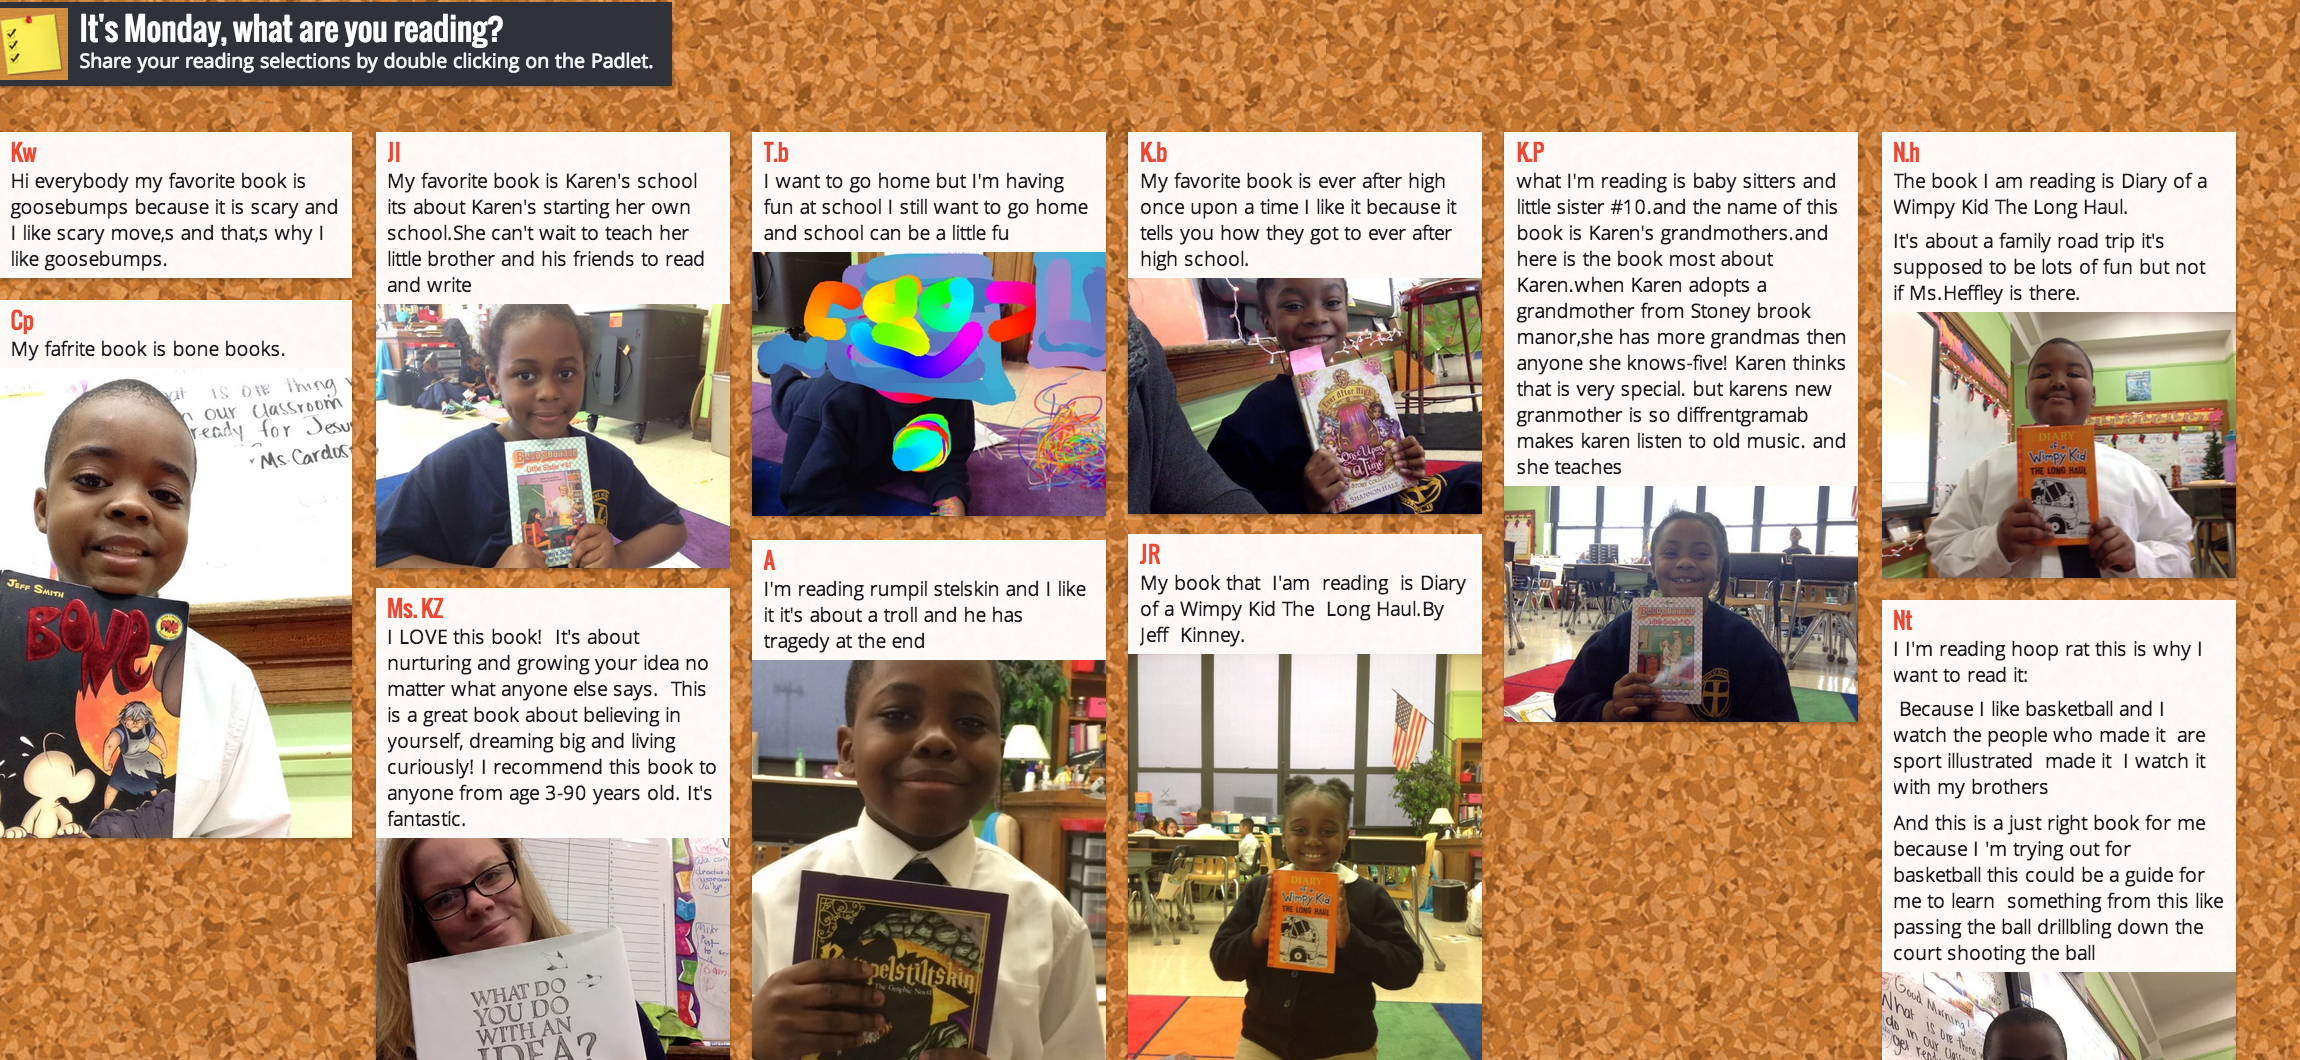
Responding to reading


credit: https://teachbytes.com/2015/01/10/10-ways-to-use-padlet-in-your-classroom-tomorrow/

How could you use Padlet with your students?

Tuesday, September 19, 2017

Tech Tuesday-Flip Grid

Have you heard of this?!?! Flip Grid is a highly versatile tool that all teachers will want in their arsenal of tech tools.


We all have all kinds of students in our classrooms; the quiet kids who have wonderful ideas, but never want to speak in front of their peers, the kids with great insights who struggle to write their ideas on paper, or the kids who have no problem sharing, but can get off topic.  With Flip Grid you can give the quiet students a voice, give the struggling writer a way to express himself/herself, and give kids a limited amount of time to get their ideas out (with unlimited chances to re-record).

Flip Grid allows you to set up a "grid" (think class) where you can post "topics" for your students.  Students respond to your post, which can be written, video you record, video you upload, images, or anything in your Google Drive.  You get to control the privacy settings (password protection) and choose if students can post automatically or if you need to approve their responses first.

Check out this video tutorial from Stacey Roshan (@buddyxo) on how to set up your teacher account and start your first topic.

Tuesday, February 21, 2017

Adding Events to a Shared Calendar

Google Calendars are great for shared spaces.  We will be using this for scheduling purposes in the IDEA Lab.  If you are unsure of how to add an event to a shared calendar be sure to check out this short tutorial.

Monday, June 13, 2016

Setting Up a Teacher Account on Seesaw

Emily from Seesaw explains how to set up a teacher account.  She points out some settings that you will want to consider before using Seesaw with students.

Since our school uses Google I would recommend choosing the "Sign in with Google" option rather than creating a new account.  This way you can use your school email and password and have one less log in to remember!

In the video, she is using an iPad to create her account, but in my opinion it would be easier to do the initial set up from computer.  This way when you are entering your student names you can easily copy and paste from a class roster, or you can still type in the names, but at least you have a keyboard.

The iPad app and the website look identical, so navigation should be the same regardless of the device you are using.

Setting Passcode and Wallpaper

In order to add some personality to the iPads, many teachers have their students set the wallpaper and lock screen to show the student's face.  This allows the teacher to quickly identify who the iPad belongs to.  Students can also use their lunch/library code as their passcode for added security.  This videos explains how to set up these two features.


Downloading a Purchased App

This video teaches students how to install an app that our school has purchased (even if it is free) from the app store.


iPad Navigation

A quick overview of how to navigate the iPad.


iPad Expectations and Buttons

As we begin the school year it is important to teach students about the tools they will be using and the expectations for using those tools.  This short video gives students a brief overview of the tools and buttons on an iPad.